PERFMAG2.LEN - A Perfect Lens
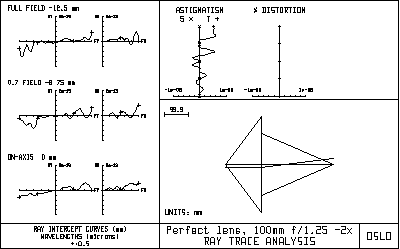
Perfmag2 is an example of a perfect lens. It should be studied to understand the difference between a perfect lens and a paraxial lens, as well as the definitions of aperture-based operating conditions used in OSLO. A perfect lens is one that forms a sharp undistorted image of an extended object on a plane surface. If the aperture of the lens is infinitesimal, the rays passing from the object to the image will follow the laws of paraxial optics. If the aperture of the lens is finite, however, this will not be the case. Abbe's sine law states that for finite rays, the ratio of the sines of the object and image axial ray angles must be constant. This conflicts with the laws of paraxial optics, which state that the ratio of the tangents of the angles must be constant. OSLO uses true perfect lenses, i.e. ones that obey the laws of optics, to model idealized systems. As a result, OSLO results will be different from programs that use paraxial lenses to model idealized systems. The perfmag2.len file is included in the demo directory to illustrate some properties of perfect lenses that may seem curious to those who are not familiar with them. The lens is purposely chosen to be very fast (N.A. 0.8 on the short conjugate side), and to work at a magnification of -2x, so that the differences between a perfect lens and a paraxial lens are obvious. The drawing below shows a basic ray analysis of the lens at its nominal magnification.

All the ray aberrations are essentially zero, according to the definition of a perfect lens (the residual wiggles are due to round-off errors). The drawing of the lens is unusual. In OSLO, a perfect lens is modeled as a single surface. If the lens is to obey the sine law, however, this means that the rays must emerge from the surface at a different height than they enter, which accounts for the strange drawing. The paraxial data for the perfect lens are shown below.
*PARAXIAL SETUP OF LENS APERTURE
Entrance beam radius: 200.000000 Image axial ray slope: -0.666667 Object num. aperture: 0.800000 F-number: 0.250000
Image num. aperture: 0.400000 Working F-number: 1.250000 FIELD Field angle: 4.763642 Object height: -12.500000 Gaussian image height: 25.000000 Chief ray ims height: 25.000000 CONJUGATES
Object distance: 150.000000 Srf 1 to prin. pt. 1: — Gaussian image dist.: 300.000000 Srf 2 to prin. pt. 2: — Overall lens length: — Total track length: 450.000000 Paraxial magnification: -2.000000 Srf 2 to image srf: 300.000000
OTHER DATA Entrance pupil radius: 200.000000 Srf 1 to entrance pup.: — Exit pupil radius: 200.000000 Srf 2 to exit pupil: — Lagrange invariant: -16.666667 Petzval radius: 1.0000e+40 Effective focal length: 100.000000
It is worth spending a little time to see how the values are calculated. First, the focal length of the lens is specified to be 100mm, the magnification is specified to be -2, the numerical aperture is specified as .8, and the object height is specified as -12.5mm; these are all given data. The focal length and magnification specifications imply that the object distance must be 150mm, and the image distance must be 300mm. The magnification and numerical aperture specifications imply that the numerical aperture on the image side must be .4. If the numerical aperture is .8, the axial (marginal) ray in object space must make an angle arcsin(.8) = 53.130102 degrees with the optical axis, and must strike the lens at a height of 150*tan(53.130102) = 200mm, which is the entrance beam radius. The f-number, defined as the focal ratio f/D, must then be 100/400 = .25. The working f-number, defined as 1/(2*NA), is then 1/(2*0.4) = 1.25. The image axial ray slope (a paraxial quantity) is -200/300 = -.666667. Since the numerical aperture in image space is 0.4, the angle of a real ray emerging from the lens must be -arcsin(.4) = -23.578178 degrees. If this ray is to pass through the paraxial image point, it must emerge from the lens at a height 300*tan(23.578178) = 130.930734mm. This is easily confirmed by tracing a real ray from an on-axis object point, as shown below. The difference in ray height between the input and output rays is thus caused by the fact that we are dealing with a real perfect lens, not a paraxial approximation. Since an actual ray could obviously not follow the displayed trajectory, the implication is that a real perfect lens cannot be infinitely thin.
*SET OBJECT POINT
FBY FBX FBZ — — — FYRF FXRF FY FX — — — — YC XC YFS XFS OPL REF SPH RAD
— — — — 300.000000 299.999993 *TRACE RAY – LOCAL COORDINATES SRF Y X Z YANG XANG D 1 200.000000 — — 53.130102 — —
2 130.930734 — — -23.578178 — -127.326835 3 5.6843e-14 — — -23.578178 — 327.326835 PUPIL FY FX OPD 1.000000 — —
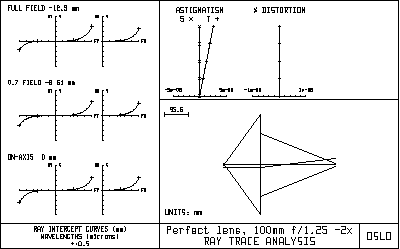
A perfect lens cannot be characterized solely by a focal length. It is necessary also to specify a magnification at which it is to be used. This is because a lens cannot form a perfect image at two magnifications (Herschel's rule). The perfect lens used here can be used to demonstrate this by changing the magnification by 5% to -2.1. Then the object distance becomes 147.619048mm, and the image distance 310mm. The ray analysis shows that even with this small change in operating condition, there is a substantial overcorrected spherical aberration.

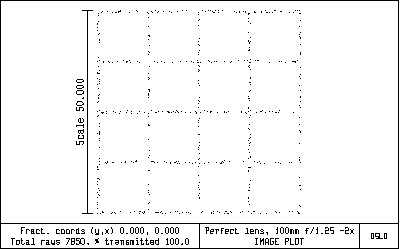
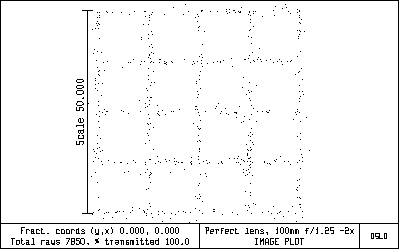
The effects of using the perfect lens at the wrong magnification are sufficiently dramatic that they can easily be seen in the image of a rectangular grid (obtained using the *xsource command).


